
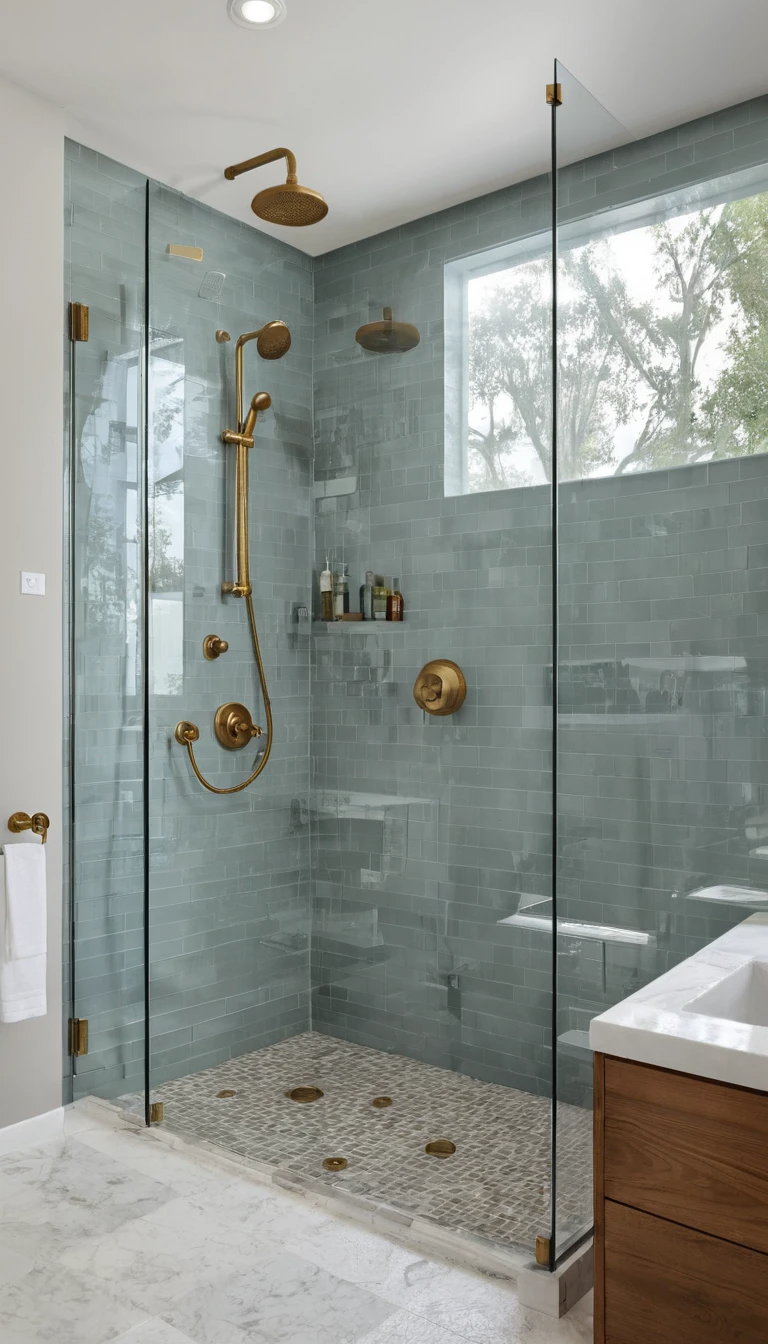
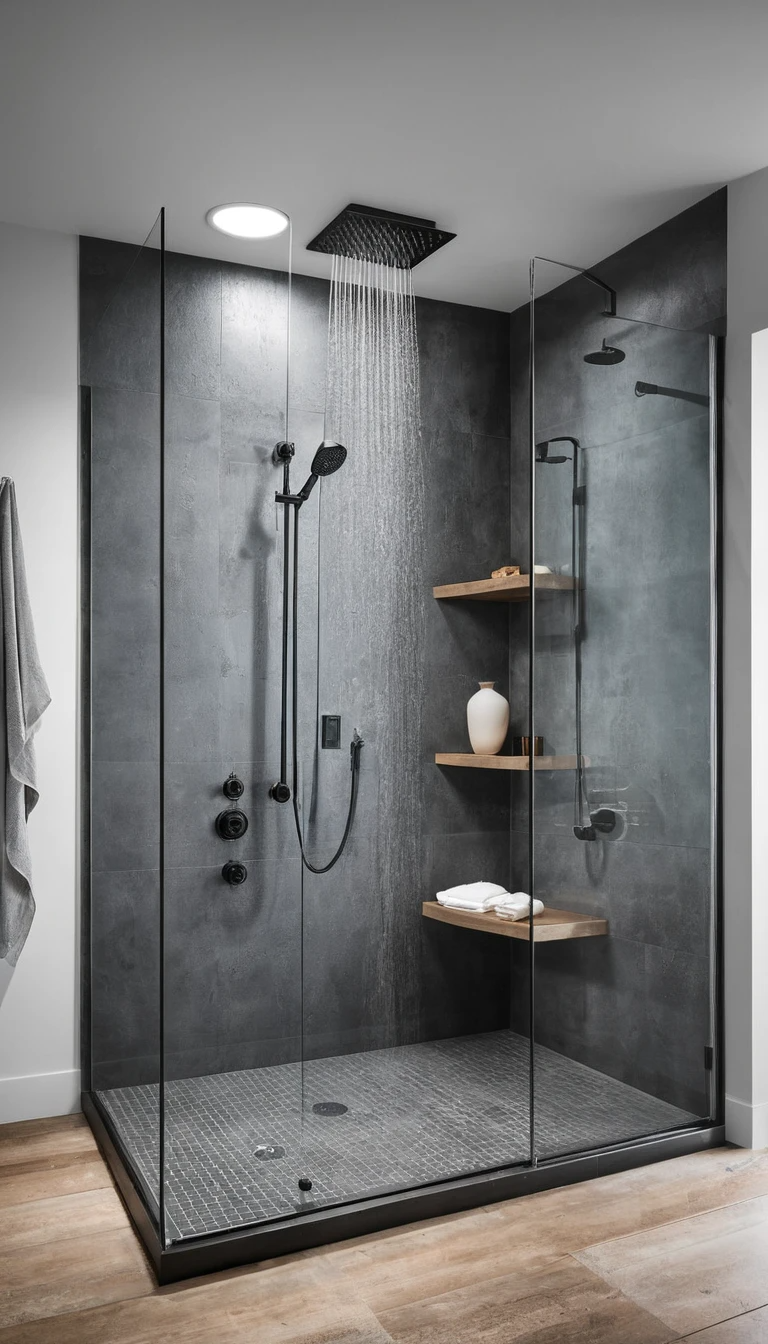
Modern shower ideas combine luxury and practicality with sleek aesthetics and smart design. Frameless glass doors, rainfall showerheads, and built-in benches create a spa-like feel. Use large-format tiles, pebble floors, or textured stone for a contemporary finish. Wall niches and hidden shelving offer practical storage without cluttering the space. Digital temperature controls and LED lighting enhance comfort and style.

Open-concept showers with curbless entry add accessibility and a minimalist vibe. Black matte fixtures, brass accents, or natural wood touches can elevate the design. Whether it’s a master bath upgrade or a small bathroom remodel, modern shower ideas bring both form and function to your daily routine.
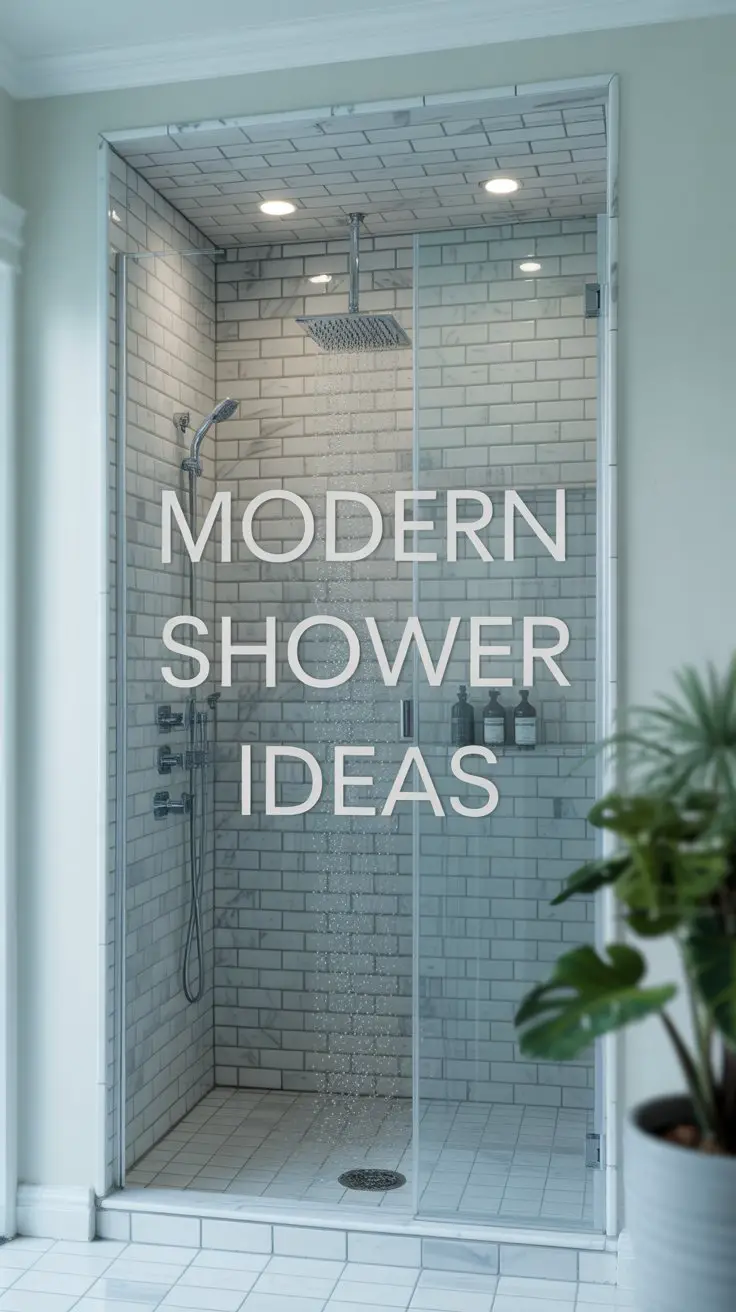
Modern Shower Ideas
Here’s a 100+ list of Modern Shower Ideas covering design styles, materials, features, and accents for a sleek and functional bathroom upgrade:
🚿 Shower Design Styles
-
Frameless glass shower
-
Walk-in shower
-
Curbless shower
-
Open-concept shower
-
Wet room design
-
Corner shower enclosure
-
Tiled walk-in shower
-
Steam shower unit
-
Modern industrial shower
-
Scandinavian-style shower
🧱 Wall & Tile Ideas
-
Marble tile walls
-
Large-format porcelain tiles
-
Subway tiles with dark grout
-
Herringbone tile pattern
-
Geometric mosaic tiles
-
Vertical stacked tiles
-
Concrete-effect tiles
-
Stone-look ceramic tiles
-
Hexagon wall tiles
-
Terrazzo tiled walls
🧼 Flooring Ideas
-
Pebble tile floor
-
Wood-look porcelain tile
-
Slip-resistant matte tile
-
Mosaic shower floor
-
Cement-style tiles
-
Marble hex floor
-
Black slate tiles
-
Graphic cement tiles
-
Linear drain floor design
-
Radiant heated flooring

🚰 Fixtures & Fittings
-
Wall-mounted rain showerhead
-
Ceiling-mounted rain head
-
Matte black fixtures
-
Brushed gold hardware
-
Chrome minimalist handles
-
Thermostatic shower mixer
-
Digital shower controls
-
Waterfall showerhead
-
Multi-spray panel
-
Built-in temperature display
💡 Lighting Ideas
-
Recessed LED lights
-
Lighted shower niche
-
Ceiling-mounted pendant lights
-
Waterproof strip lighting
-
Color-changing ambient lighting
-
Motion-activated lighting
-
Skylight above shower
-
Edge-lit mirror inside shower
-
Under-bench lighting
-
Dimmable light controls
🪟 Glass & Enclosure Options
-
Frosted glass panels
-
Clear frameless glass
-
Black grid glass panels
-
Tinted glass
-
Pivot shower door
-
Sliding barn-style door
-
Half-glass divider
-
Textured glass screens
-
Full glass wall shower
-
Corner glass enclosure
🧴 Storage & Shelving
-
Built-in shower niches
-
Floating corner shelves
-
Recessed wall caddies
-
Glass shelves
-
Wooden ledges
-
Stainless steel wall baskets
-
Integrated shampoo dispensers
-
Towel bar inside shower
-
Storage bench with lid
-
Vertical wall tower shelf
🪑 Seating Ideas
-
Fold-down teak bench
-
Built-in tiled bench
-
Acrylic clear bench
-
Stone corner seat
-
Waterproof cushioned seat
-
Freestanding marble bench
-
Concrete shower stool
-
Hidden pull-out seat
-
Heated shower seat
-
Floating wood bench
🌿 Natural & Spa-Inspired Features
-
Indoor plants (like ferns)
-
Wood slat ceiling
-
Zen stone décor
-
Bamboo floor mat
-
Aromatherapy diffuser shelf
-
Eucalyptus shower bundle
-
Natural wood shelf accent
-
Rainfall spa mist feature
-
Rock garden corner
-
Calming blue and grey tones
🧩 Custom Shower Ideas
-
Double showerheads
-
Couples’ dual zone shower
-
Body jets and massagers
-
Ceiling waterfall feature
-
Built-in waterproof Bluetooth speaker
-
Mosaic mural wall
-
Backlit onyx tile
-
Voice-controlled shower
-
Infrared heat therapy panels
-
Frosted privacy smart glass
💡 Extra Modern Touches
-
Touchless faucet outside shower
-
Wall-mounted towel warmer
-
Fog-free smart mirror
-
Digital aroma release
-
Chrome ceiling rain curtain
-
Smart exhaust fan with light
-
Steam-resistant LED panels
-
Sensor-activated waterfall spout
-
Adjustable-height showerhead
-
Timer-controlled water-saving feature
Designs of Showers
Frameless Glass Shower
-
Step 1: Plan the Layout
Measure the bathroom space and decide on the size and position of the shower. Frameless glass showers work best in larger bathrooms where openness is desired. -
Step 2: Choose Glass Type
Select tempered, safety glass for durability. It should be at least 3/8 inch thick for optimal strength. -
Step 3: Install Base and Drain
Install a water-tight shower base or custom floor pan with a drain system that directs water toward the drain. -
Step 4: Mount Brackets
Install minimal metal brackets on the walls to support the glass panels. These are typically made of stainless steel for a sleek, modern look. -
Step 5: Attach Glass Panels
Secure the glass panels with the brackets and hardware. Use silicone seals to ensure there are no leaks. -
Step 6: Add Showerhead and Fixtures
Install the showerhead and any other shower fixtures, like wall-mounted faucets or handheld units.
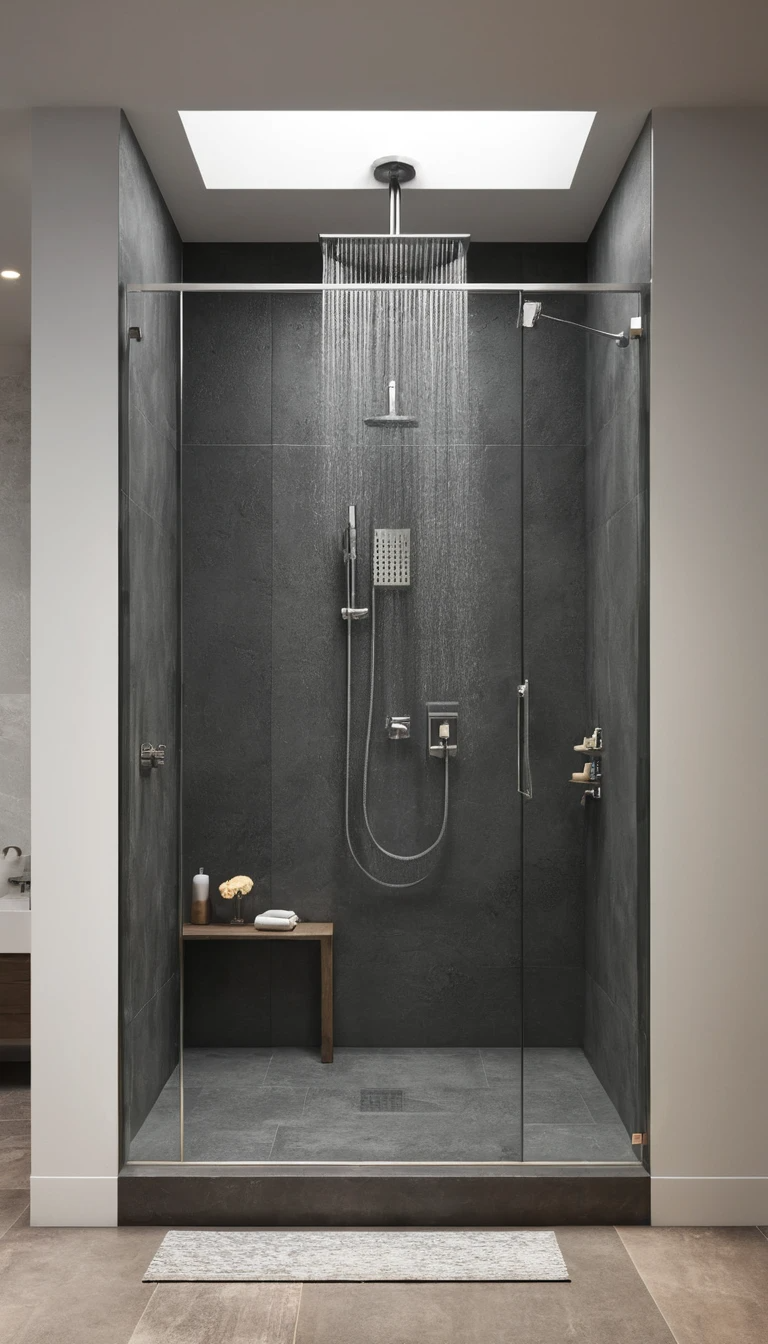
Walk-In Shower
-
Step 1: Measure the Space
Determine the space available for the shower and plan accordingly. Walk-in showers generally don’t need a door. -
Step 2: Install Drain and Waterproofing
Install a central drain and waterproof the entire area. The floor should be slightly sloped to direct water to the drain. -
Step 3: Create Shower Area Boundaries
Use tiles or glass panels to define the shower space. If using glass, install hinges or brackets to hold the panels in place. -
Step 4: Add a Showerhead
Install a rainfall showerhead or a wall-mounted showerhead, depending on the layout and desired flow. -
Step 5: Add Storage
Install built-in niches or shelves for shampoo, soap, and other shower essentials.
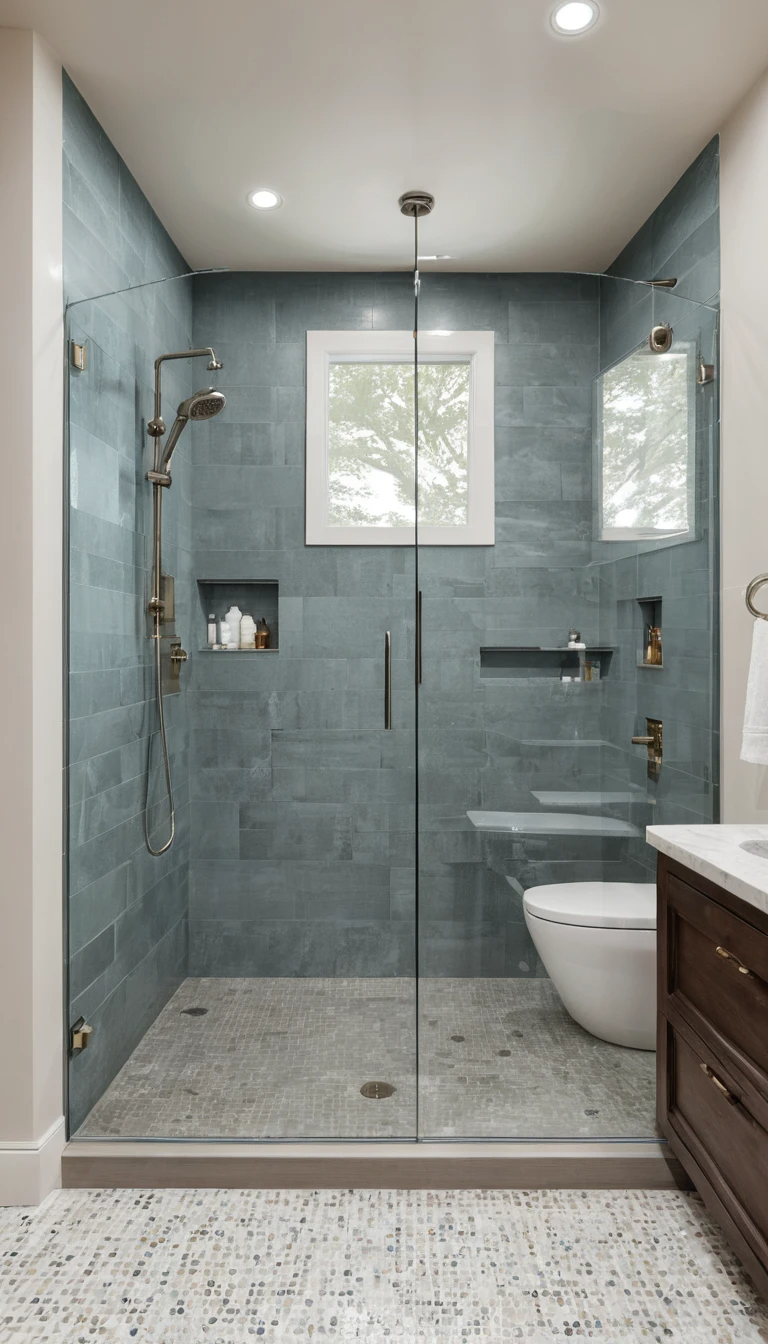
Curbless Shower
-
Step 1: Install Waterproofing and Sloped Floor
Waterproof the entire shower area and slope the floor toward a central drain to prevent water from spilling out. -
Step 2: Remove Threshold
Instead of a traditional curb, create a smooth, level transition from the bathroom floor to the shower floor. -
Step 3: Choose Drain Placement
Opt for a linear or central drain depending on the layout. A linear drain can be placed along the wall or center for modern appeal. -
Step 4: Install Glass Panels (Optional)
For an open feel, use frameless glass panels or a partial divider to maintain a barrier without obstructing the space. -
Step 5: Add Shower Fixtures
Install a handheld showerhead or rainfall showerhead, as well as other hardware like shower faucets.
Open-Concept Shower
-
Step 1: Determine Bathroom Layout
Plan for an entirely open space with no glass or walls separating the shower from the rest of the bathroom. Ensure proper drainage. -
Step 2: Waterproof the Entire Area
Apply waterproofing treatment to the entire floor and walls to prevent water from seeping into the rest of the room. -
Step 3: Install Drainage System
Make sure the floor is sloped to guide water toward a drain placed centrally or along the perimeter. -
Step 4: Install Shower Fixtures
Opt for a large rainfall showerhead or a multi-jet shower system. Consider a handheld showerhead for flexibility. -
Step 5: Add Finishing Touches
Use floor-to-ceiling tiles, a floating vanity, or minimalist designs to blend the shower seamlessly into the open bathroom.
Wet Room Design
-
Step 1: Ensure Proper Waterproofing
Waterproof all walls and the floor thoroughly, as water will flow freely through the entire room. -
Step 2: Install Floor Drain
The entire floor should slope slightly towards a central drain to prevent water from accumulating. -
Step 3: Create Open, Seamless Space
Use open shelving and minimal partitions to create an uncluttered space. Keep the bathroom’s aesthetic unified and spacious. -
Step 4: Add Shower Fixtures
Install a rain showerhead or an overhead shower, depending on the room’s dimensions and user preferences. -
Step 5: Install Glass or No Partition
If desired, install a glass partition to separate the shower area while maintaining the open feel of the space.
Corner Shower Enclosure
-
Step 1: Measure the Corner Space
Assess the available space in the corner of the bathroom to fit a compact shower enclosure. -
Step 2: Choose Your Shower Style
Choose a square or neo-angle enclosure. Corner showers often have glass panels and a door, but can also be fully enclosed with acrylic or tile. -
Step 3: Install Base and Drain
Set up the shower base and install the drain. Ensure it is watertight and correctly aligned. -
Step 4: Mount the Shower Walls
Install the walls of the enclosure, either using tiles or prefabricated materials like acrylic. -
Step 5: Install Shower Door and Fixtures
Attach the glass door or sliding door system. Add showerheads and other fixtures such as shelves or towel bars.
Tiled Walk-In Shower
-
Step 1: Select Tile and Layout
Choose your tile material (ceramic, porcelain, or natural stone) and plan the layout, ensuring the design flows seamlessly with the bathroom. -
Step 2: Install Waterproofing and Drain
Waterproof the floor and walls, and install a drain in the lowest point of the floor to ensure proper water drainage. -
Step 3: Tile the Walls and Floor
Begin tiling the walls and the floor, ensuring the floor slopes toward the drain. Use grout to fill in the spaces between tiles. -
Step 4: Add Shower Fixtures
Install a large rainfall showerhead or multi-function shower system. Consider adding a built-in bench or shelf for storage. -
Step 5: Install Glass Panels (Optional)
Install frameless glass panels to maintain the walk-in look while preventing water from splashing outside the shower area.
Steam Shower Unit
-
Step 1: Install a Sealed Enclosure
Create a fully enclosed shower area with a steam-proof door and sealed walls to trap steam inside. -
Step 2: Install Steam Generator
Set up the steam generator, ensuring it’s properly connected to the water supply and power source. -
Step 3: Waterproof and Insulate the Room
Apply waterproofing and ensure that insulation is in place to hold the heat and steam inside the unit. -
Step 4: Choose Shower Fixtures
Install a steam showerhead or an overhead rain showerhead. Consider adding seating for comfort. -
Step 5: Control Panel and Ventilation
Install a control panel for adjusting temperature and steam levels. Ensure there’s adequate ventilation for the unit.
Modern Industrial Shower
-
Step 1: Choose Materials
Use raw, unfinished materials like exposed steel, concrete, and brick to give the shower a gritty, industrial look. -
Step 2: Install Glass or Metal Walls
Use either glass panels or metal-framed walls. Industrial designs often feature exposed pipes and bold fixtures. -
Step 3: Focus on Lighting
Incorporate bold, industrial light fixtures such as Edison bulbs to add atmosphere to the space. -
Step 4: Add Shower Fixtures
Install a wall-mounted showerhead, preferably in matte black or brass, to complement the industrial theme. -
Step 5: Add Industrial Accessories
Use rugged, minimalist shelves or metal storage baskets to enhance the overall design.
Scandinavian-Style Shower
-
Step 1: Keep It Simple
Choose light, neutral colors like white, gray, and soft wood tones. Scandinavian design values simplicity and functionality. -
Step 2: Install a Clean, Tiled Floor
Opt for large-format tiles or light-colored wood-look tiles for the shower floor. -
Step 3: Use Frameless Glass Panels
Install clear, frameless glass panels to keep the space open and airy. The design should feel uncluttered. -
Step 4: Add Natural Elements
Incorporate wood accents, such as a wooden shower bench or shelving, to bring warmth to the design. -
Step 5: Focus on Lighting
Install soft, diffused lighting for a relaxed, calming atmosphere, which is a hallmark of Scandinavian bathrooms.