
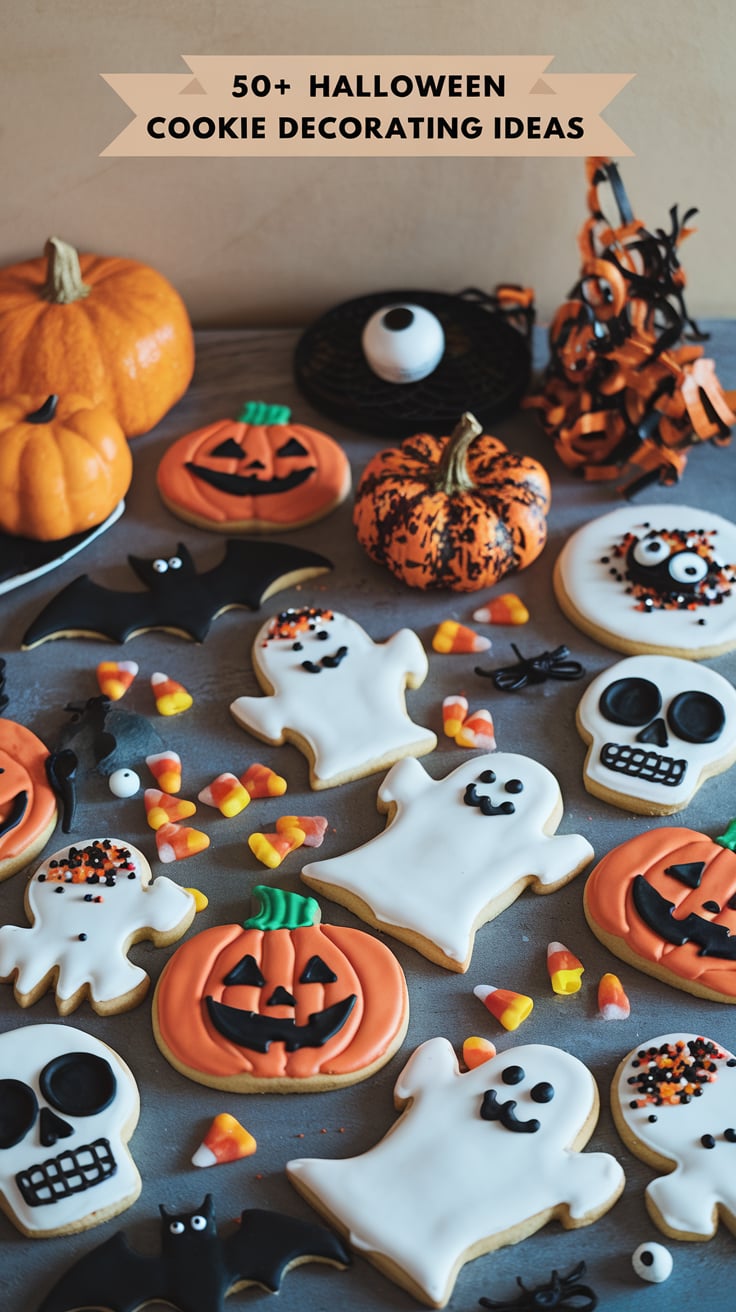
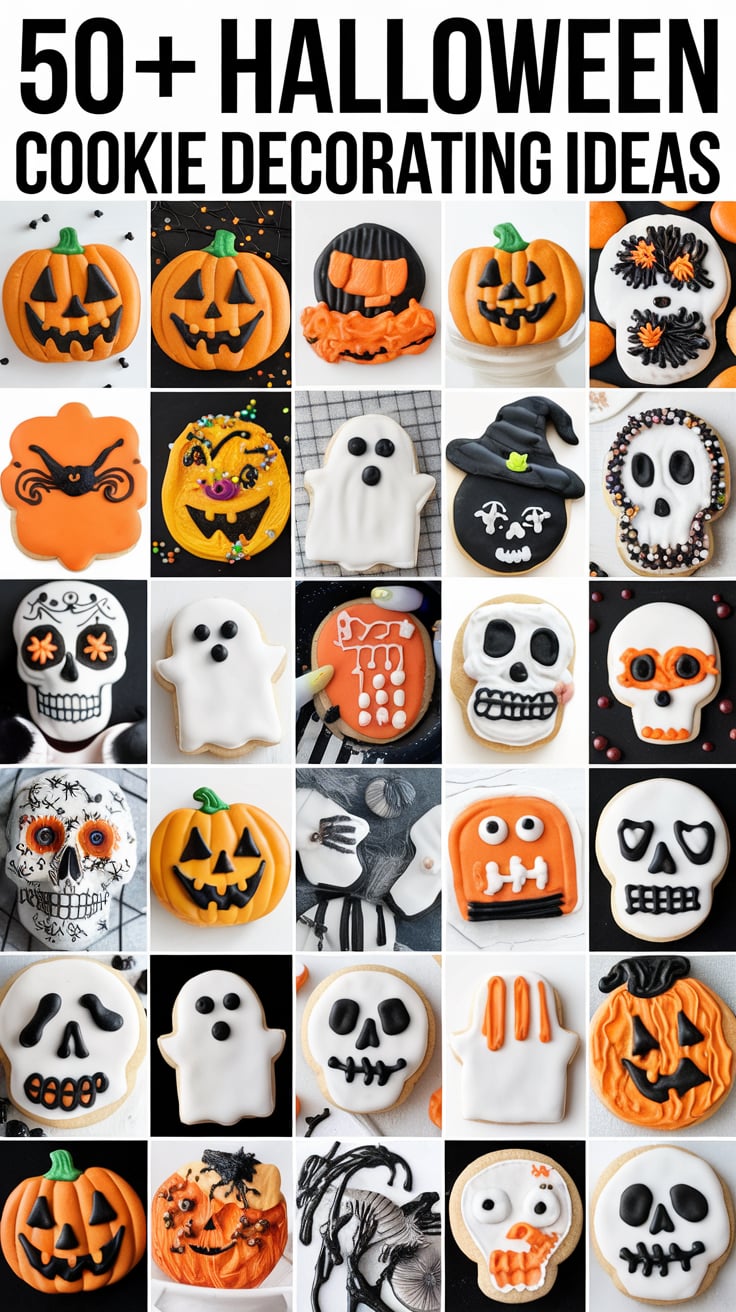
Halloween Cookie Decorating Ideas – Halloween cookie decorating is a fun and creative way to celebrate the spooky season with delicious treats. From classic pumpkin-shaped cookies with vibrant orange icing to eerie ghost and skeleton designs, there are endless possibilities to bring Halloween magic to your baked goods. Use royal icing to create intricate spiderwebs, haunted houses, or creepy eyeballs, and add edible decorations like candy eyeballs, sprinkles, and colored sugar for extra detail.
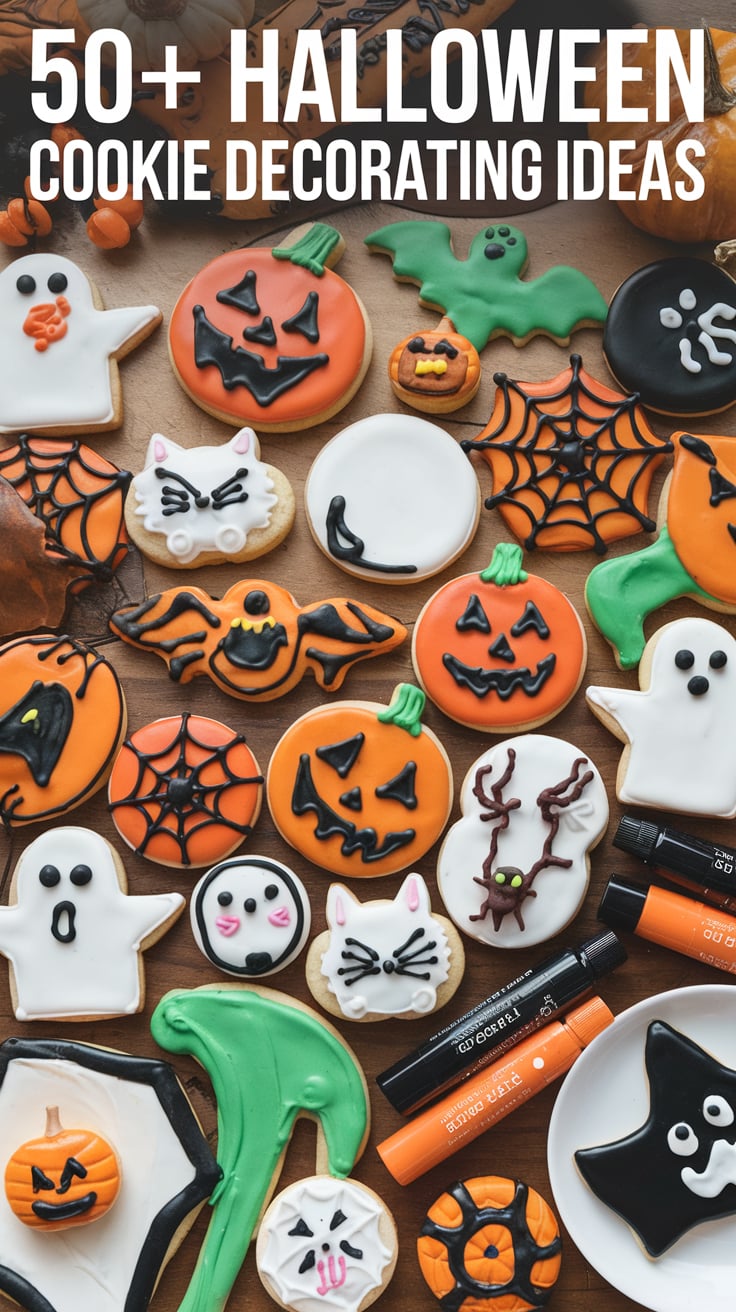
Black, orange, purple, and green food coloring can help achieve a festive and spooky look, while cookie cutters in the shapes of bats, witches’ hats, and black cats add a fun touch. For an interactive experience, set up a DIY decorating station with different icings, piping bags, and edible glitter so kids and adults alike can enjoy making their own creepy yet delicious creations.
Whether making mummy-wrapped cookies with white icing or Frankenstein-themed treats with green frosting and candy stitches, Halloween cookies are a delightful way to add a festive and tasty element to any celebration!
Halloween Cookie Decorating Ideas
Here’s a list of 100+ Halloween Cookie Decorating Ideas to inspire your spooky baking creations!
Classic Halloween Shapes & Characters
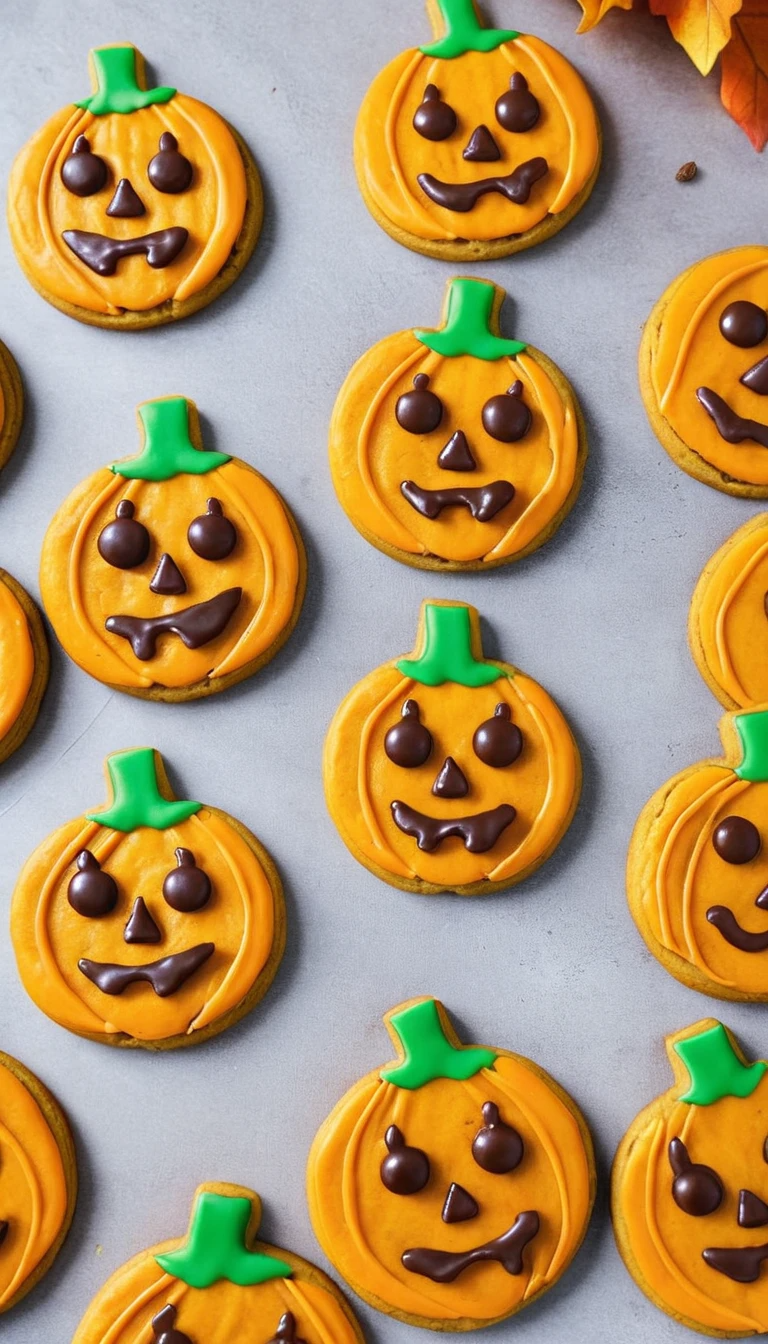
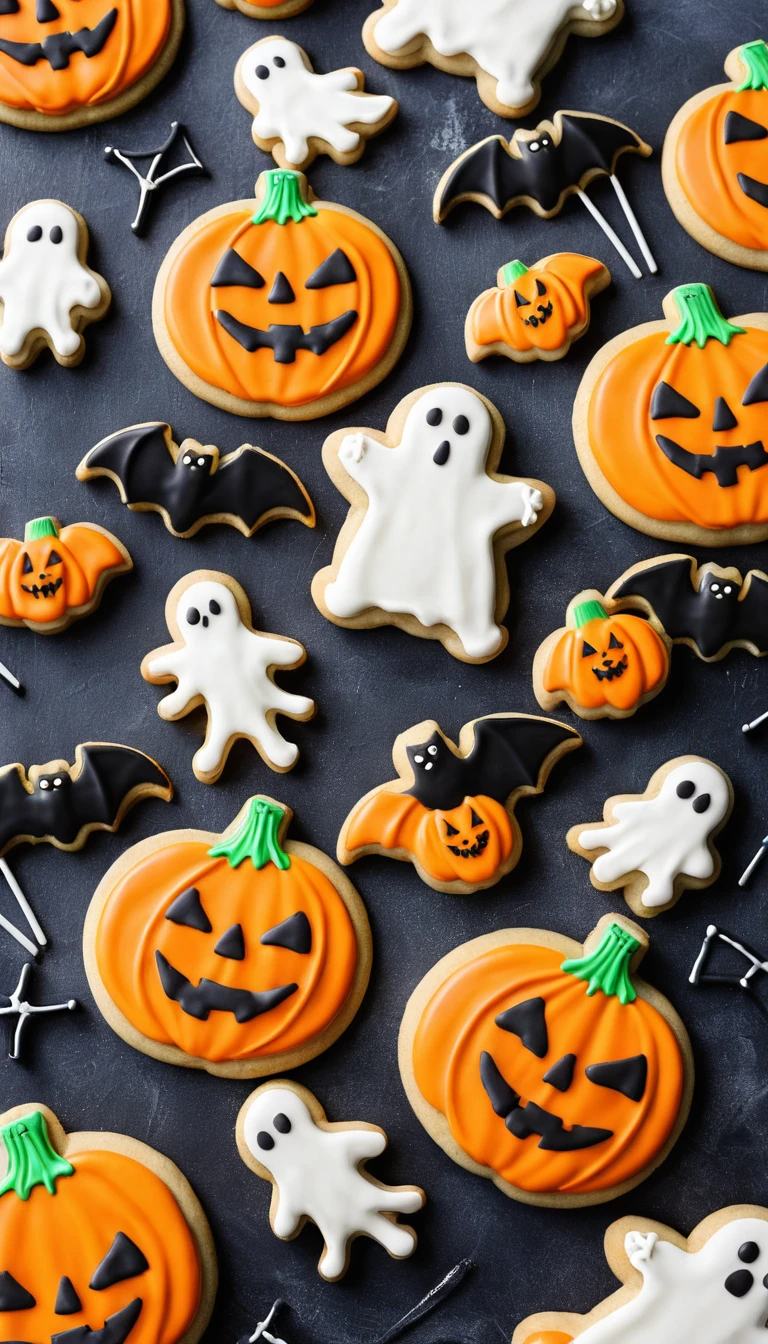
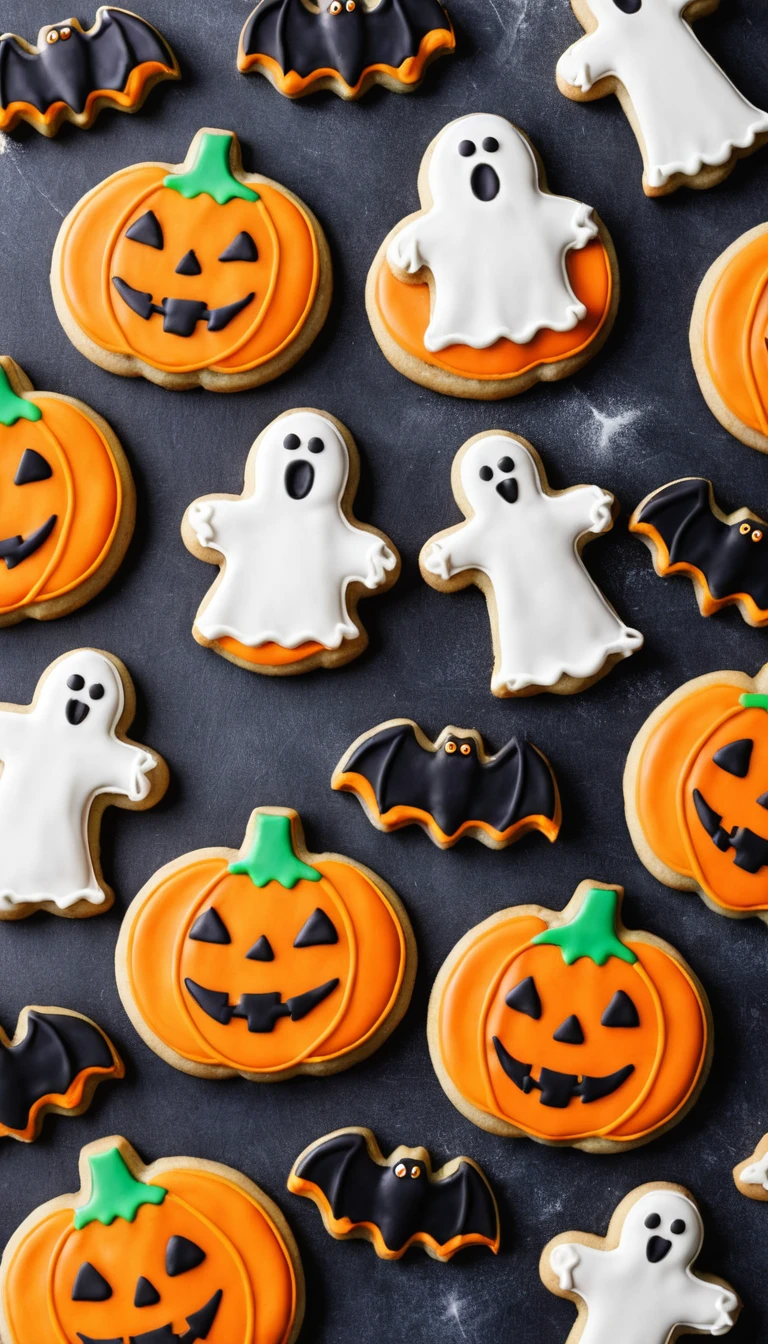
- Pumpkin Face Cookies – Orange icing with Jack-o’-lantern expressions
- Ghost Cookies – White icing with black eyes and mouth
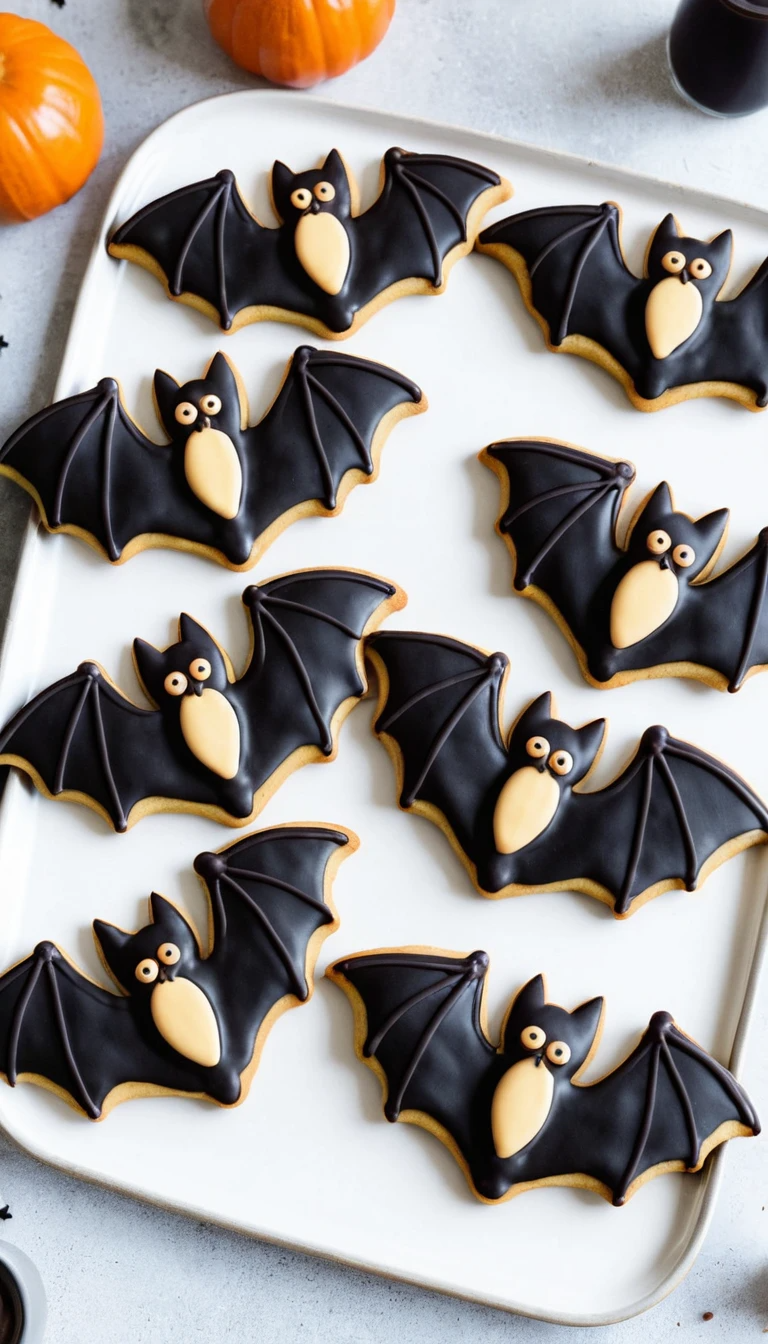
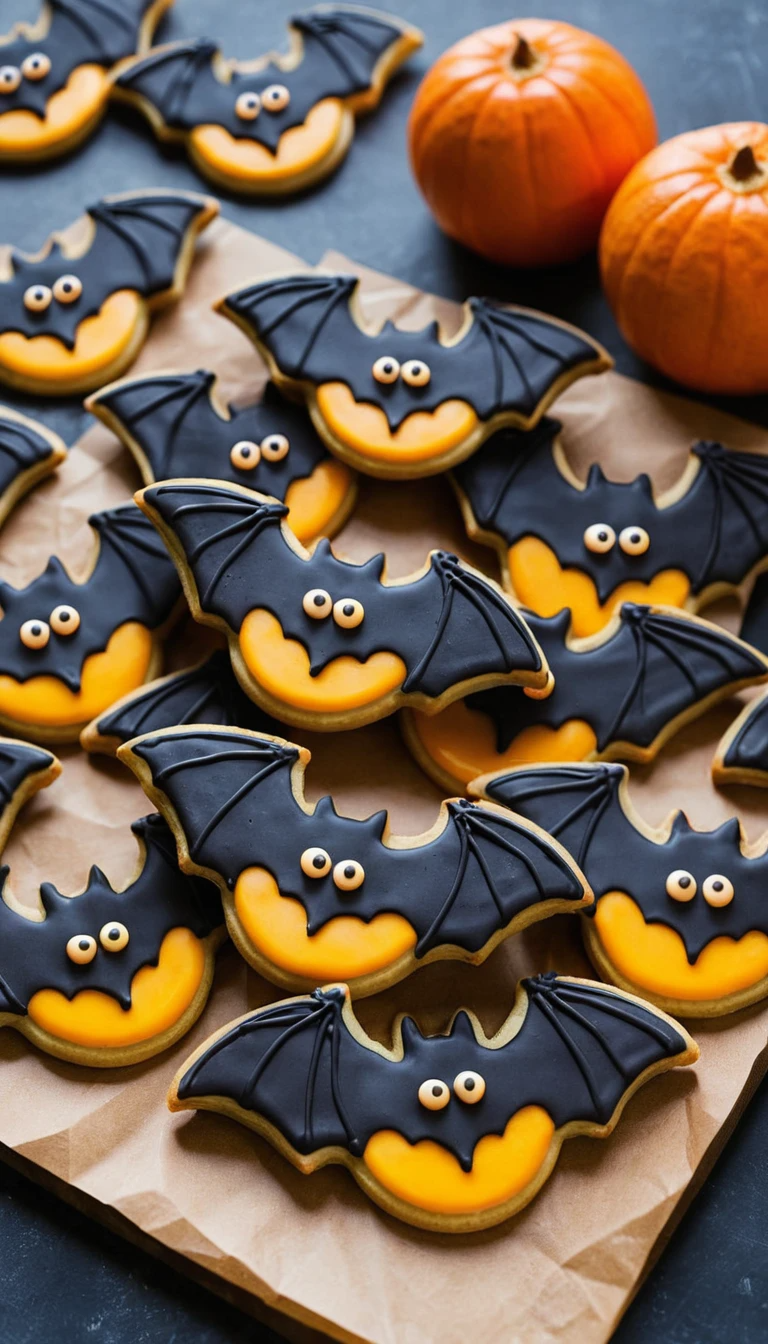
- Bat Cookies – Black icing with detailed wings
- Black Cat Cookies – Black icing with yellow eyes
- Witch Hat Cookies – Black icing with purple and green details
- Cauldron Cookies – Bubbling green potion effect
- Skull Cookies – White icing with black eye sockets and cracks
- Mummy Cookies – White icing stripes with candy eyes
- Frankenstein Cookies – Green icing with black stitches
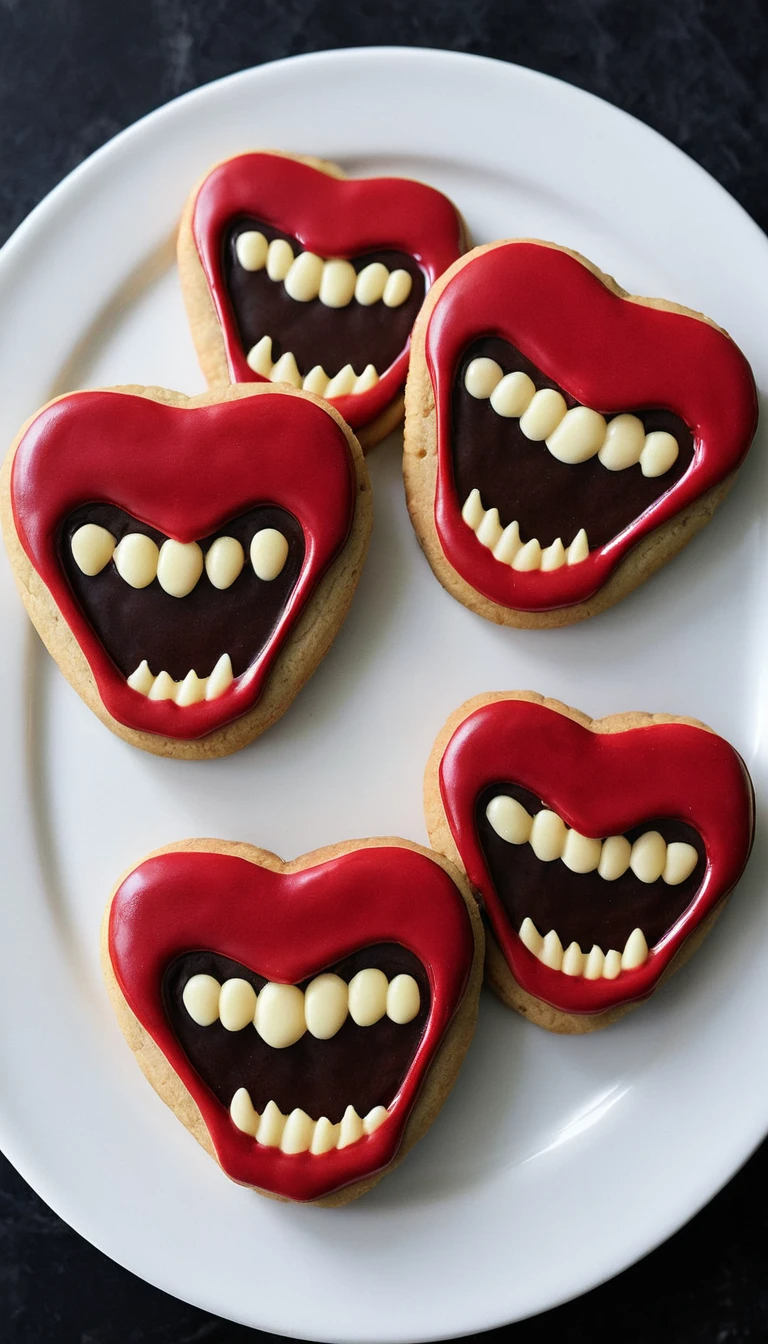
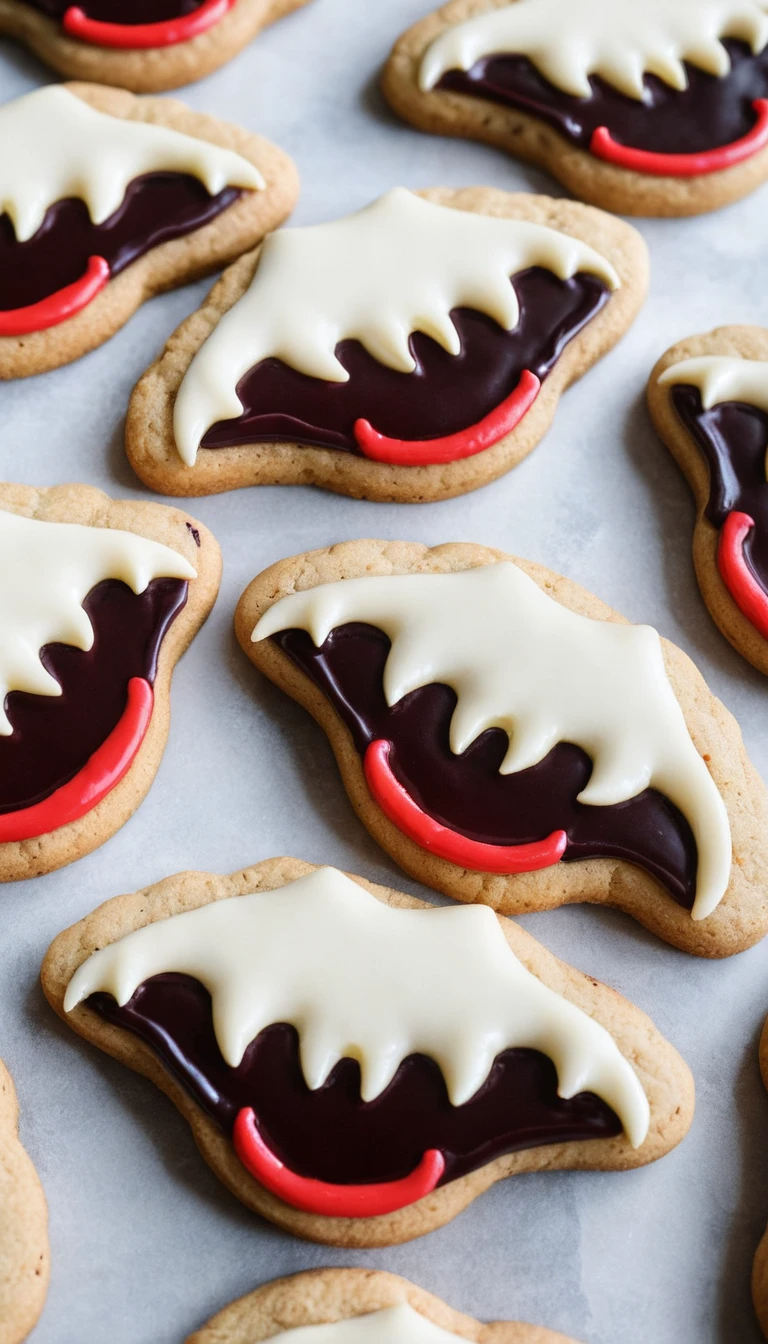
- Vampire Cookies – Red lips with fangs
Creepy & Spooky Designs
- Spiderweb Cookies – Black or white icing with a web pattern
- Eyeball Cookies – White icing, red veins, and candy eyes
- Bloody Handprint Cookies – Red icing handprints
- Witch Broom Cookies – Brown icing with broomstick texture
- Haunted House Cookies – Black silhouette with glowing windows
- Gravestone Cookies – Gray icing with RIP letters
- Monster Face Cookies – Green, blue, and purple icing with goofy features
- Bloody Finger Cookies – Shaped like fingers with red icing “blood”
- Zombie Cookies – Green icing with cracked skin details
- Skeleton Bone Cookies – White icing on bone-shaped cookies
Cute & Fun Halloween Cookies
- Candy Corn Cookies – Yellow, orange, and white icing layers
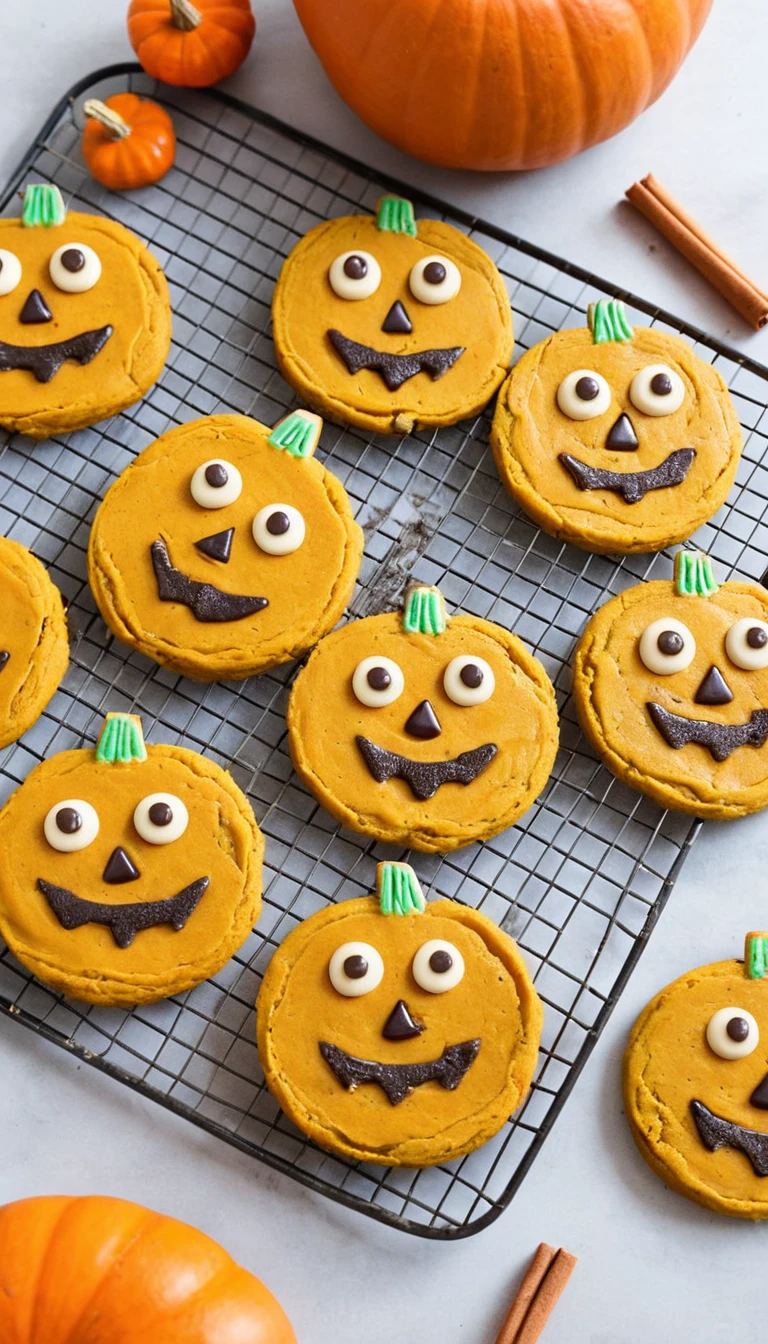
- Smiling Pumpkin Cookies – Cute Jack-o’-lantern faces
- Happy Ghost Cookies – Adorable smiling ghost faces
- Frankenstein’s Bride Cookies – Green icing with stitched lips and white hair
- Cute Bat Cookies – Small bats with friendly eyes
- Little Monster Cookies – Round cookies with silly faces
- Baby Mummy Cookies – Mini cookies with icing bandages
- Potion Bottle Cookies – Bright colored icing with bubbling effect
- Spell Book Cookies – Brown icing with gold details
- Spooky Cloud Cookies – Gray icing with misty swirls

Gory & Horror-Themed Cookies
- Severed Finger Cookies – Realistic fingers with almond “nails”
- Bloody Brain Cookies – Pink icing shaped like a brain
- Oozing Wound Cookies – Red and purple icing with 3D effects
- Vampire Bite Cookies – Bite mark with red icing drips
- Werewolf Paw Cookies – Brown icing with claw marks
- Splattered Blood Cookies – White cookies with red icing splatters
- Haunted Mirror Cookies – Silver icing with a ghostly figure
- Torn Skin Cookies – Flesh-colored icing with red “wounds”
- Cursed Doll Cookies – Stitched-up face with button eyes
- Shadow Figure Cookies – Black icing ghostly figures
Halloween-Themed Animal Cookies
- Black Widow Spider Cookies – Red hourglass on black cookie
- Owl Cookies – Brown icing with candy eyes
- Rat Cookies – Gray icing with small candy eyes
- Raven Cookies – Black icing with sharp details
- Snake Cookies – Twisting snake shape with scaly texture
- Wolf Cookies – Gray icing with fur detail
- Frog Cookies – Green icing with slimy texture
- Beetle Cookies – Black and iridescent icing for creepy bug effect
- Vampire Bat Cookies – Sharp wings with red eyes
- Spooky Fish Cookies – Glow-in-the-dark effect using neon icing
Glow-in-the-Dark & Neon Halloween Cookies
- Glow-in-the-Dark Ghost Cookies – White icing with glow dust
- Neon Pumpkin Cookies – Bright orange with neon green stems
- Electric Spiderweb Cookies – Neon purple, green, and orange webs
- Bright Monster Cookies – Neon-colored fur and goofy eyes
- Neon Skeleton Cookies – Black base with bright neon bones
- Glow-in-the-Dark Potion Cookies – Bright green, blue, and pink potion effects
- Rainbow Bat Cookies – Colorful wing designs
- Neon Haunted House Cookies – Glowing windows and details
- Funky Skull Cookies – Sugar skull-inspired bright colors
- Trippy Eyeball Cookies – Psychedelic swirling iris
Gourmet & Elegant Halloween Cookies
- Black & Gold Pumpkin Cookies – Matte black with gold detailing
- White & Silver Ghost Cookies – Elegant ghost patterns
- Marbled Haunted House Cookies – Swirling black, gray, and white icing
- Gothic Lace Cookies – Black lace designs on white cookies
- Dark Chocolate Spiderweb Cookies – Drizzled chocolate webs
- Witch’s Cauldron Cookies – Black cookies with shimmery green icing
- Caramel Drip Pumpkin Cookies – Pumpkin-shaped with caramel drizzle
- Dark Rose & Skull Cookies – Black roses on gray icing
- Gold Leaf Bat Cookies – Gold-dusted details
- Coffin Cookies – Black icing with silver embellishments
Halloween-Themed Food & Candy Cookies
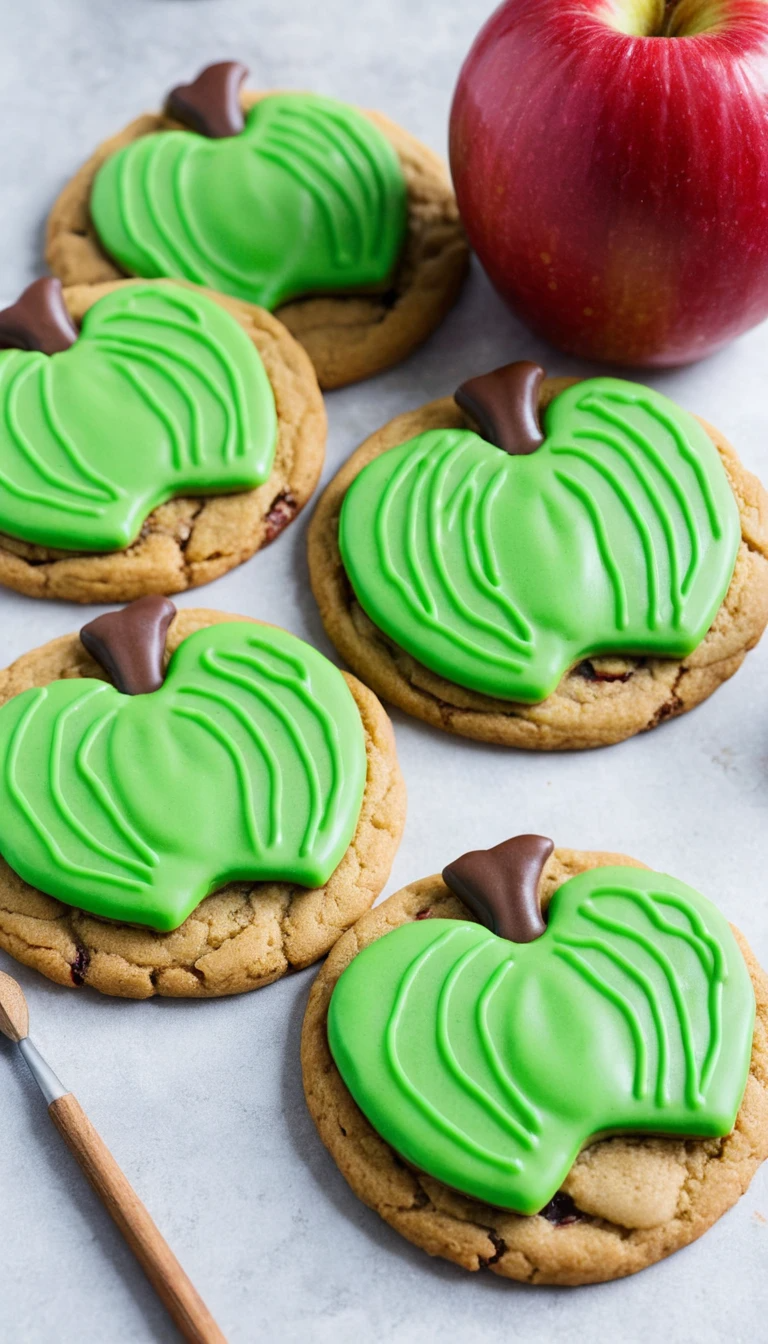
- Poison Apple Cookies – Green icing with red drip
- Cupcake Monster Cookies – Cookies shaped like tiny Halloween cupcakes
- Candy Bucket Cookies – Iced to look like trick-or-treat pails
- Popcorn Box Cookies – Red and white striped designs
- Ice Cream Cone Monster Cookies – Green “melting” ice cream design
- Candy Bar Cookies – Snickers, Twix, or Kit-Kat-inspired cookies
- Chocolate Drizzle Spider Cookies – Dark chocolate spider designs
- Lollipop Ghost Cookies – White icing with stick details
- Chocolate Pumpkin Cookies – Chocolate-flavored pumpkin shapes
- Toffee Apple Cookies – Green and caramel-colored icing
Haunted House Party-Themed Cookies
- Vampire Teeth Cookies – Red lips with fangs
- Ghostly Window Cookies – Translucent sugar glass effect
- Haunted Clock Cookies – Old clock face with Roman numerals
- Creepy Door Cookies – Wooden door icing with a peeking eye
- Broken Doll Cookies – Stitched cracks and one missing eye
- Trapped Soul Cookies – Face pressing against the cookie surface
- Dark Castle Cookies – Tall gothic castle with glowing windows
- Floating Candle Cookies – Candle-shaped with “wax” icing drips
- Potion Recipe Book Cookies – Brown icing with eerie writing
- Eerie Chandelier Cookies – Black icing chandelier with silver accents
Miscellaneous Spooky Halloween Cookies
- Spider Leg Cookies – Eight-leg detailed cookie
- Foggy Forest Cookies – Tree silhouettes on gray icing
- Creepy Doll Face Cookies – Doll heads with cracks
- Tentacle Cookies – Purple icing tentacles curling
- Spooky Swirl Cookies – Black and orange marbled effect
- Cauldron Bubble Cookies – Bubbly green icing
- Graveyard Scene Cookies – RIP tombstones and spooky trees
- Haunted Train Cookies – Black steam engine with eerie details
- Vampire Castle Cookies – Tall castle with red windows
- Burning Candle Cookies – White icing with orange flame
These Halloween Cookie Decorating Ideas can be a fun way to unleash creativity for a party, baking competition, or festive treat-making! 🎃👻🍪
How to Make
Here’s a detailed step-by-step guide to making each of these Halloween-themed cookies from scratch, including baking the sugar cookies and decorating them with royal icing.
Step 1: Prepare the Basic Sugar Cookie Dough
Ingredients:
- 2 ½ cups all-purpose flour
- 1 tsp baking powder
- ½ tsp salt
- ¾ cup unsalted butter (softened)
- ¾ cup granulated sugar
- 1 large egg
- 2 tsp vanilla extract
Instructions:
- Mix Dry Ingredients: In a bowl, whisk together the flour, baking powder, and salt. Set aside.
- Cream Butter & Sugar: In another bowl, beat the butter and sugar until light and fluffy (about 2 minutes).
- Add Egg & Vanilla: Mix in the egg and vanilla extract until combined.
- Combine: Gradually add the dry ingredients to the wet mixture, mixing until a soft dough forms.
- Chill Dough: Wrap the dough in plastic wrap and refrigerate for 30 minutes.
- Preheat Oven: Set to 350°F (175°C).
- Roll & Cut: Roll out dough to ¼-inch thickness and cut out shapes using cookie cutters.
- Bake: Bake for 8-10 minutes or until edges are lightly golden. Let cool completely before decorating.
Step 2: Prepare Royal Icing
Ingredients:
- 3 cups powdered sugar
- 2 tbsp meringue powder
- 5-6 tbsp warm water
- Gel food coloring (orange, black, white, green, red, yellow, purple)
Instructions:
- Whisk Ingredients: In a bowl, mix powdered sugar and meringue powder.
- Add Water: Slowly add warm water while beating on medium speed for 5 minutes until icing is smooth and slightly thick.
- Color Icing: Divide icing into bowls and color as needed. Transfer to piping bags.
Step 3: Decorate Each Cookie
1. Pumpkin Face Cookies
- Base Color: Flood cookie with orange icing and let dry.
- Jack-o’-lantern Face: Use black icing to draw eyes, nose, and mouth.
- Stem & Details: Pipe a brown stem and add green vines.
2. Ghost Cookies
- Base Color: Flood the cookie with white icing.
- Eyes & Mouth: Use black icing to pipe two round eyes and an oval mouth.
3. Bat Cookies
- Base Color: Cover the cookie in black icing.
- Wing Details: Use a fine-tip piping bag to add wing outlines.
- Eyes: Add yellow or red icing dots for glowing eyes.
4. Black Cat Cookies
- Base Color: Coat the cookie with black icing.
- Eyes: Use yellow icing to create eyes and black icing for pupils.
- Whiskers & Nose: Pipe thin white lines for whiskers.
5. Witch Hat Cookies
- Base Color: Flood the cookie with black icing.
- Hat Band: Pipe a purple or green stripe across the hat.
- Buckle: Use yellow icing to create a small square buckle.
6. Cauldron Cookies
- Base Color: Cover the cookie with black icing.
- Bubbling Potion: Use green icing to create a bubbling effect on top.
- Bubbles: Pipe small green dots on the cauldron’s surface.
7. Skull Cookies
- Base Color: Flood with white icing.
- Facial Features: Pipe black icing for hollow eyes, a nose cavity, and a stitched mouth.
- Cracks: Add small, thin lines for realistic skull cracks.
8. Mummy Cookies
- Base Color: Flood with white icing.
- Bandages: Pipe thin white lines in a crisscross pattern.
- Eyes: Add two candy eyes or pipe small black dots for eyes.
9. Frankenstein Cookies
- Base Color: Flood with green icing.
- Hair & Stitches: Pipe black icing on the top for hair and across the face for stitches.
- Eyes & Mouth: Pipe white and black icing for eyes and a stitched mouth.
10. Vampire Cookies
- Base Color: Flood with red icing.
- Lips & Fangs: Pipe white icing for fangs and black for the lips’ outline.
- Blood Drips: Add red icing to create a dripping effect from the fangs.
11. Spiderweb Cookies 🕸️
How to Make:
- Base Layer: Flood the cookie with black or white icing and let it dry.
- Web Design: Pipe thin concentric circles in the opposite color (black on white, white on black).
- Create Web Effect: Use a toothpick to drag lines outward from the center to form a web pattern.
- Optional: Add a small black icing spider.
12. Eyeball Cookies 👁️
How to Make:
- Base Layer: Flood the cookie with white icing and let it dry.
- Pupil & Iris: Pipe a large colored circle (green, blue, or red) for the iris and a small black dot in the center for the pupil.
- Veins: Use a fine red icing tip to draw squiggly blood veins from the edges inward.
13. Bloody Handprint Cookies 🩸
How to Make:
- Base Layer: Flood the cookie with white icing and let it dry.
- Handprint Effect: Dip a small hand (or a stencil) in red icing and press it onto the cookie for a bloody effect.
- Blood Drips: Pipe red icing at the edges and let it drip naturally.
14. Witch Broom Cookies 🧹
How to Make:
- Base Layer: Flood the cookie with brown icing and let it dry.
- Broomstick Details: Pipe a long brown stick from one end to the other.
- Bristles: Use a toothpick to drag lines downward from the icing to create broom bristles.
- Decoration: Add a small black icing bow at the top of the bristles.
15. Haunted House Cookies 🏚️
How to Make:
- Base Layer: Flood the cookie with black icing for a silhouette effect.
- Windows: Pipe yellow or orange icing to create glowing windows.
- Roof & Door: Use gray icing for details like the roof, door, and bricks.
- Final Touches: Add tiny white ghost shapes or spiderwebs.
16. Gravestone Cookies 🪦
How to Make:
- Base Layer: Cover with gray icing and let it dry.
- Lettering: Pipe “RIP” in black icing for a spooky gravestone effect.
- Aging Effect: Use a sponge with a tiny bit of darker gray icing to dab around edges for a stone texture.
- Grass Detail: Pipe green icing at the base for a graveyard feel.
17. Monster Face Cookies 👹
How to Make:
- Base Layer: Flood with green, blue, or purple icing for monster skin.
- Facial Features: Use black icing for eyebrows, stitches, or scars.
- Eyes & Mouth: Add candy eyes or pipe white icing circles. Draw jagged mouths with white or black icing.
- Hair or Horns: Pipe black or colored icing to create wild monster hair or horns.
18. Bloody Finger Cookies ☠️
How to Make:
- Shape the Dough: Before baking, roll the dough into finger-shaped logs and press in a small indentation for the fingernail.
- Base Layer: After baking, flood with skin-tone icing (light brown, beige, or white).
- Nail & Knuckles: Pipe red icing at the fingernail area for a severed effect.
- Blood Drips: Use thicker red icing to create realistic blood dripping from the cut.
19. Zombie Cookies 🧟
How to Make:
- Base Layer: Flood with green icing for zombie skin.
- Cracks & Scars: Pipe black icing to create cracks in the skin.
- Eyes & Mouth: Use white icing for bulging eyes and red icing for blood around the mouth.
- Extra Details: Pipe stitches or exposed bones for added creepiness.
20. Skeleton Bone Cookies 💀
How to Make:
- Shape Dough: Before baking, mold the dough into bone shapes with rounded ends.
- Base Layer: Flood with white icing and let dry.
- Bone Details: Use gray icing to outline the bone structure and add shading for depth.
- Aging Effect: Lightly sponge darker icing around edges for a worn-out look.
Step 4: Let the Cookies Dry
- Allow all decorated cookies to dry completely at room temperature for about 2-4 hours before handling.
These Halloween cookies are fun, spooky, and perfect for any Halloween celebration! 🎃👻🍪