
Gallery wall ideas offer a stylish way to showcase your personality, memories, and creativity on your walls. Whether you prefer a clean, symmetrical layout or a more eclectic mix, gallery wall ideas can transform any blank space into a focal point. You can use a variety of elements like framed art, photographs, mirrors, quotes, and even 3D objects to create visual interest.
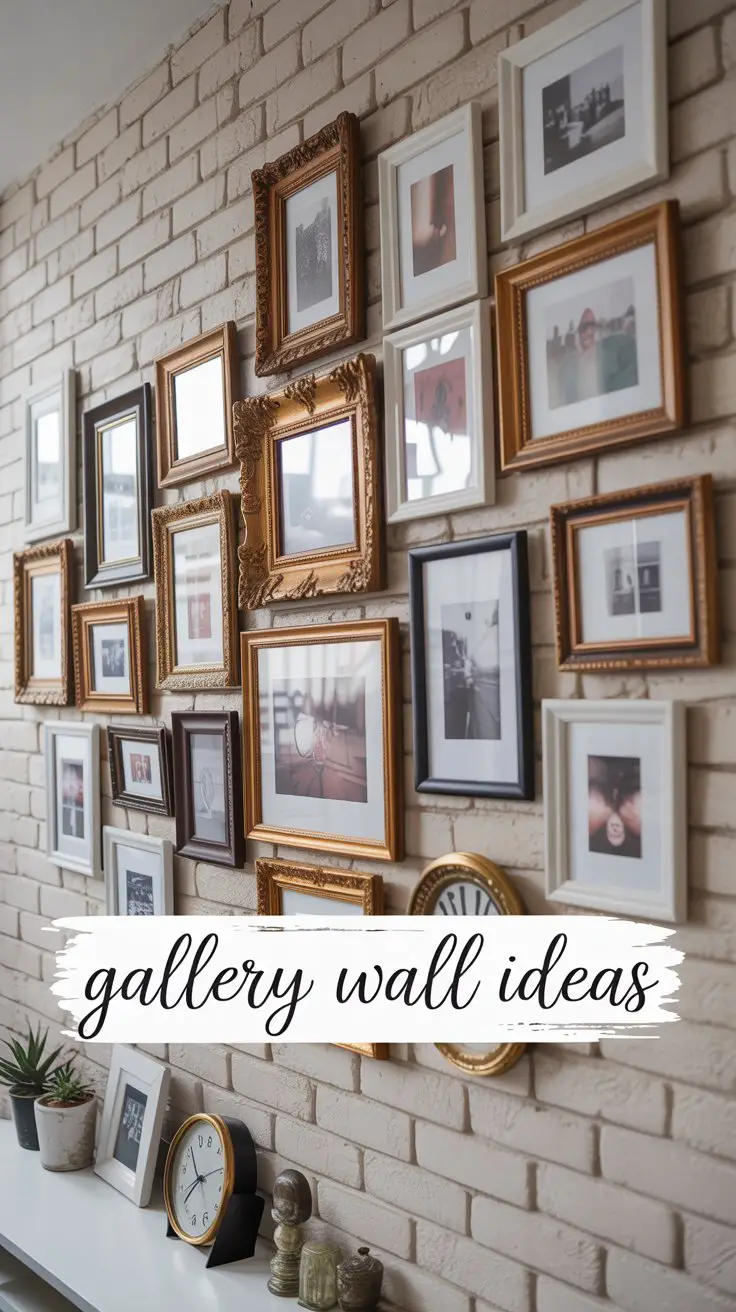
Mixing frame sizes, colors, and materials adds depth and texture, while sticking to a theme—such as black-and-white photography or botanical prints—can keep the look cohesive. Perfect for living rooms, hallways, staircases, or bedrooms, gallery wall ideas provide endless opportunities to personalize your space with meaning and style.
Gallery Wall Ideas
Here’s a 100+ item list of Gallery Wall Ideas to help you plan and create a stunning, personalized display in your home. These ideas are grouped by layout styles, content types, frame ideas, arrangement tips, themes, and creative touches.
🖼️ Layout Styles
-
Grid layout
-
Salon-style layout
-
Linear row
-
Staircase gallery
-
Centered anchor piece
-
Symmetrical layout
-
Asymmetrical cluster
-
Column-style vertical layout
-
Horizontal stripe layout
-
Corner gallery wrap
-
Floor-to-ceiling gallery
-
Overlapping frames
-
Gallery above sofa
-
Gallery above headboard
-
Mini gallery over console table
🖼️ Content Ideas
-
Family portraits
-
Travel photography
-
Landscape photos
-
Black & white photography
-
Watercolor prints
-
Inspirational quotes
-
Abstract art
-
Vintage posters
-
Botanical prints
-
Album covers
-
Childhood art
-
Wedding photos
-
Pet portraits
-
Favorite movie scenes
-
Architecture photography
-
Maps of places you love
-
Minimalist line art
-
Seasonal artwork
-
Fashion illustrations
-
Newspaper clippings or articles

🖼️ Framing Ideas
-
All-black frames
-
Mixed metal frames
-
White gallery frames
-
Wood tone mix
-
Shadow box frames
-
Frameless prints
-
Floating glass frames
-
Oversized matting
-
DIY washi tape frames
-
Vintage thrifted frames
-
Coordinated frame colors
-
Different frame shapes
-
Repurposed window frames
-
Acrylic display frames
-
Custom frame molding
🖼️ Themes
-
Travel memories
-
Coastal/beach theme
-
Monochrome gallery
-
Nature-inspired
-
Rustic farmhouse
-
Bohemian vibe
-
Industrial urban look
-
Kids’ artwork wall
-
Family heritage
-
Literary/poetry gallery
-
Celestial or astrology theme
-
Religious or spiritual theme
-
Vintage nostalgia
-
Seasonal rotation gallery
-
Music & instruments
🖼️ Creative Touches
-
Mixed media (fabric, metal, wood)
-
Mirrors in the mix
-
Decorative plates
-
Hanging plants or vines
-
3D elements like keys or tools
-
Typography & initials
-
Clipboards for interchangeable art
-
Fabric wall hangings
-
LED string lights
-
Shelf gallery with props and frames
-
Framed puzzles
-
Old book pages or sheet music
-
Travel souvenirs (e.g., postcards, currency)
-
Corkboard with pinned mementos
-
DIY canvas painting additions
🖼️ Arrangement Tips
-
Lay frames on floor before hanging
-
Use paper templates on wall
-
Keep spacing consistent (e.g., 2” apart)
-
Align by center lines, not edges
-
Start with largest frame in the center
-
Hang with command strips for easy changes
-
Use a gallery rail with hooks
-
Combine art and mirrors
-
Display art in pairs
-
Try an odd number of pieces for visual interest
🖼️ Room-Specific Ideas
-
Hallway gallery
-
Stairway gallery
-
Dining room conversation wall
-
Home office inspiration wall
-
Bedroom cozy corner gallery
-
Kitchen food art gallery
-
Nursery with family photo wall
-
Bathroom mini gallery
-
Living room above sofa
-
Entryway statement gallery
-
Reading nook with literary art
How to Decorate Gallery Wall
Here’s a detailed step-by-step guide on how to decorate a gallery wall, whether you’re curating family photos, art prints, or eclectic pieces. This process ensures balance, cohesion, and impact.
Step 1: Choose Your Location
Identify where your gallery wall will go:
-
Popular locations: Living room wall, stairway, hallway, bedroom, above sofa or console table.
-
Make sure the wall is visible, well-lit, and has enough space to support the layout you envision.
Step 2: Define the Purpose or Theme
Decide the focus:
-
Themes: Family memories, travel, black & white photography, botanical prints, abstract art, quotes, vintage finds.
-
Mood: Minimal and sleek, eclectic and vibrant, modern, or rustic.
Step 3: Select Your Artwork or Photos
-
Collect 5–20+ pieces depending on the wall size.
-
Combine different types: photography, art prints, drawings, typography, or mixed media.
-
Choose a cohesive color palette or visual style (e.g., all black-and-white, same artist, or unified color tones).
Step 4: Pick Frames and Materials
-
Choose your framing style:
-
Uniform frames for a clean, modern look.
-
Mixed frames (colors, sizes, finishes) for a boho or vintage style.
-
Frame types: Wood, metal, acrylic, matted, floating frames.
-
-
Consider adding mirrors, canvas prints, or 3D elements for texture.
Step 5: Plan Your Layout on the Floor
-
Lay your artwork out on the floor first:
-
Use painter’s tape to mark off the wall’s dimensions.
-
Try various arrangements: grid, linear, salon-style cluster, or anchor piece with surrounding smaller frames.
-
Adjust spacing—2–3 inches between frames is ideal for a clean look.
-
Step 6: Trace and Tape Templates on the Wall
-
Cut out paper templates the same size as your frames.
-
Tape them to the wall with painter’s tape to visualize placement.
-
Use a level and tape measure to keep everything aligned.
Step 7: Hang the Art
-
Start from the center or largest piece and build out.
-
Use nails, picture-hanging hooks, or Command strips for renter-friendly options.
-
Double-check alignment as you go, especially with grid layouts.
-
Don’t be afraid to adjust if something looks off once it’s up.
Step 8: Add Decorative Touches (Optional)
-
Integrate:
-
Wall sconces or picture lights for drama.
-
Plants or hanging planters for texture.
-
Small shelves with decor pieces or sculptures.
-
Washi tape or clips for a casual, changeable look.
-
Step 9: Step Back and Edit
-
View your wall from different angles.
-
Ensure visual balance (no area should feel too “heavy”).
-
Don’t overload—negative space is important.
Step 10: Maintain and Refresh
-
Dust frames regularly.
-
Swap in new art or seasonal pieces to keep it fresh.
-
Rotate art if you want to create a seasonal gallery wall or themed displays throughout the year.