
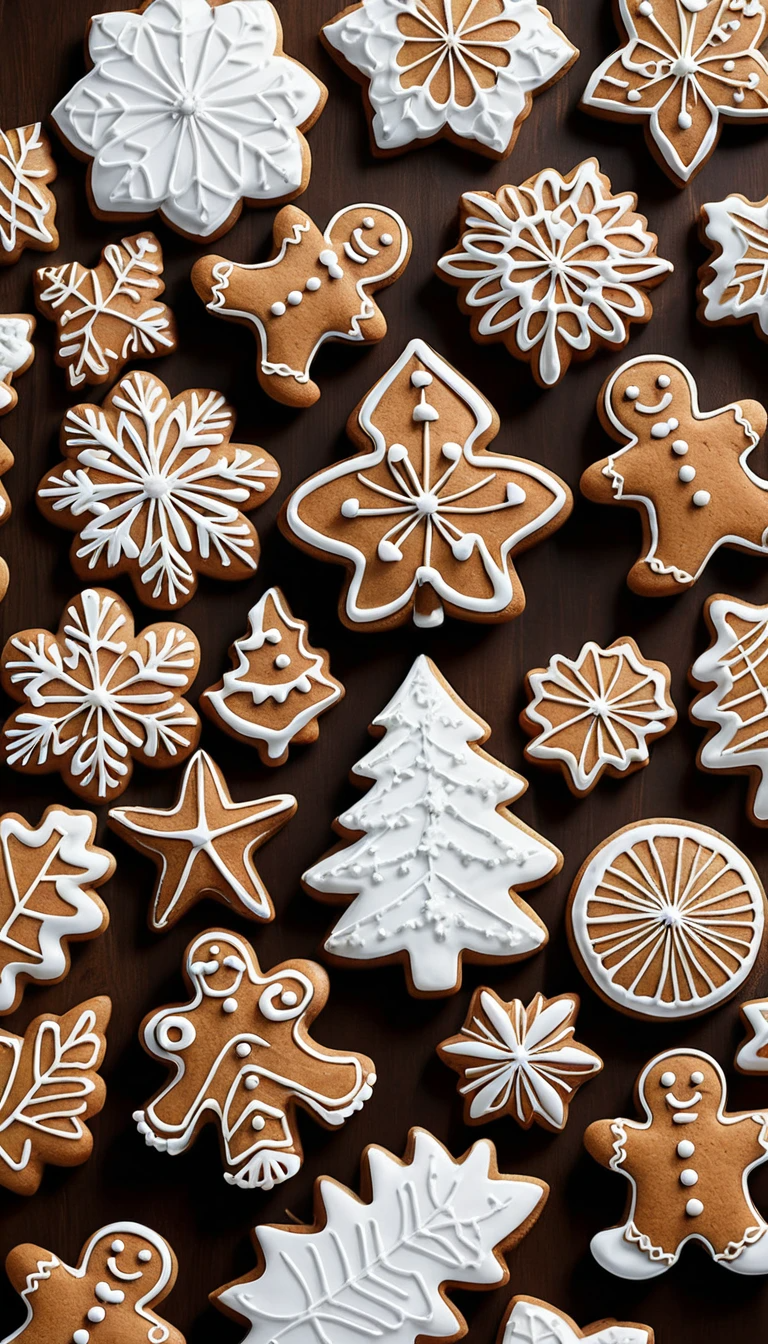
Gingerbread Cookie Decorating Ideas – Gingerbread cookie decorating is a fun and creative activity that brings the holiday spirit to life. Start with classic gingerbread men shapes, then let your imagination run wild with decorating options. Use royal icing in vibrant colors to create intricate designs on the cookies, such as smiling faces, colorful buttons, and striped scarves. For a whimsical touch, add sprinkles, candied eyes, and silver dragees to make the cookies more festive.

Candy canes, miniature marshmallows, and chocolate chips can also be used to enhance the look, with a touch of edible glitter to add sparkle. For a more elaborate design, create gingerbread houses with icing “snow” on the rooftops, gumdrop shingles, and peppermint stick fences. Don’t forget to use colored sugar to add texture and sparkle, or even make your own personalized gingerbread designs with initials or holiday-themed shapes like stars and trees. These decorating ideas allow for endless creativity, turning your gingerbread cookies into a delightful edible masterpiece for the holiday season.
Gingerbread Cookie Decorating Ideas
Here’s a list of over 100 gingerbread cookie decorating ideas to inspire you during the holiday season:
Basic Gingerbread Cookie Decorating Ideas
- Classic Royal Icing Snowflakes
- Colorful Candy Cane Designs
- Smiling Gingerbread Men Faces
- Red and Green Button Decorations
- Striped Scarf Designs
- Candy Dot Buttons
- Icing Swirls for a Fun, Whimsical Touch
- Mini Marshmallow Snowmen
- Add a Bowtie with Edible Glitter
- Create Gingerbread Houses with Icing and Sprinkles
- Festive Polka Dots with Colored Icing
- Use Sprinkles for Sparkling Snow
- Marzipan Decorations for Faces or Accents
- Frost the Cookies with Glittered Sugar
- Add Silver Dragees for a Fancy Touch
- Make a Gingerbread Star Shape
- Design Mini Gingerbread Trees
- Use Candy Corn for Christmas Trees
- Frost with White Icing for Snowy Effect
- Create Gingerbread Cookie Baskets
- Add a Santa Hat on Gingerbread Men
- Decorate with Colored Sugar for Texture
- Create Holiday Garland Designs on Cookies
- Use Chocolate Chips for Eyes
- Add an Icing Belt with a Button Design

Themed Gingerbread Cookie Decorating Ideas
- Reindeer Cookies with Pretzel Antlers
- Santa Cookie Faces with Red Icing Hats
- Snowflake-Shaped Cookies with Elegant Icing Patterns
- Peppermint Swirl Cookies with Red and White Icing
- Candy Cane Cookie Shapes with Red and White Icing
- Gingerbread Snowmen with Carrot Nose (Candied)
- Frosted Gingerbread Trees with Sparkles
- Christmas Gift Box-Shaped Cookies
- Frosted Stocking Shapes with Glittery Icing
- Angel Cookie Shapes with Golden Halo Icing
- Gingerbread Gingerbread Houses with Icing Roofs
- Gingerbread Cookie Ornaments for the Tree
- Santa’s Sleigh Cookie with Mini Sugar Decorations
- Christmas Tree Cookie with Mini Candies as Ornaments
- Frosted Snowman Hat Design
- Gingerbread Sleighs with Edible Candy Reindeer
- Use Red Licorice for Candy Cane Handles
- Add Star Decorations for a Night Sky Theme
- Snowy Forest Theme with Pine Tree Cookies
- Winter Wonderland Scene with Gingerbread Houses
- Frosted Mittens or Stockings with Icing
- Winter Polar Bear with Gingerbread Cookie Shapes
- Snowflake and Frosty Designs
- Frosting Stripes to Create Santa’s Suit
- Christmas Lights Shapes with Icing ‘Lights’

Advanced and Detailed Gingerbread Cookie Decorating Ideas
- Create Plaid Designs with Colored Icing
- Use Piping Tips to Create Intricate Lace Patterns
- Royal Icing to Create Stained Glass Cookie Effects
- Embroidered Icing Cookie Designs
- Gingerbread Cookie with Hand-Painted Details
- Snowy Peaks on Gingerbread Houses
- 3D Gingerbread Houses with Lollipop Roofs
- Use Edible Paint for Detailed Designs
- Use Fruit Jellies as Stained Glass Windows
- Make Gingerbread Stars with Intricate Icing Designs
- Chocolate Drizzle Decoration
- Gingerbread Cookie Lace Snowflakes
- Cookie Hearts with Piping Designs
- Polka Dots with Different Icing Consistency
- Use Gold Leaf for a Luxurious Touch
- Detailed Animal Shapes (Deer, Rabbit) with Icing
- Gingerbread Village Scene with Multiple Cookies
- Use Royal Icing to Create Icicle Patterns on Cookies
- Create Tiny Icing Flowers for Detailed Decorating
- Use Candied Fruit for Cookie Details
- Frosting Stenciled with Cookie Cutters for Intricate Patterns
- Melted Chocolate for Roof Tiles on Gingerbread Houses
- Detailed Cookie Faces with Multicolored Icing
- Woodsy Themed Cookies with Brown Icing and Edible Trees
- Detailed Christmas Tree Cookies with Sugar Garland
- Intricate Bordering with Fine Icing Piping
- Add Shimmering Edible Glitter on Designs
- Decorate Cookies with Edible Flowers
Fun and Creative Gingerbread Cookie Decorating Ideas
- Use Pretzel Sticks for Arms on Gingerbread People
- Add Licorice as a Gingerbread Cookie Belt
- Make Gingerbread Cookie Mugs with Handles
- Cookie Faces with Candy Nose and Chocolate Chip Eyes
- Create Gingerbread Animal Prints for Animal Lovers
- Use Peanut Butter Cups as Cookie Roofs
- Create Cookie Puppets by Decorating Faces
- Use Colorful M&M’s for Gingerbread Button Designs
- Peppermint Cookie Decorations on Gingerbread
- Use Tiny Chocolate Chips to Create Reindeer Antlers
- Make Gingerbread Ballerinas with Piping Sugar Skirts
- Gingerbread Butterfly Cookie with Detailed Icing
- Gingerbread Heart Cookies with Lace Edging
- Mini Gingerbread Cookie Ornaments for the Tree
- Cookie Ferris Wheel Design Using Candy
- Decorate with Colorful Sugar for Rainbow Touches
- Create Mini Gingerbread Houses as Party Favors
- Gingerbread Cookie Trees with Multiple Layer Designs
- Mini Gingerbread Family Set for Personal Touches
- Create a Gingerbread Cookie Bouquet as Gifts
- Layered Cookie Designs with Different Icing Colors
- Frosted Gingerbread Cookie Cupcakes with Decorative Toppings
- Decorate with Fun and Edible Confetti Sprinkles
- Create Gingerbread Cookie Snow Globes
- Christmas Tree Cookie with Piping Garland
- Use Candy Hearts for Cookie Accents
- Make Gingerbread Men with Colorful Icing Hair
- Use Chocolate Coins for Cookie Detailing
- Place Gingerbread Stars Over Candy Cane Bases
- Use Frosted Almonds to Create Snowman Buttons
- Decorate Gingerbread Cookies with Sprigs of Fresh Mint
- Gingerbread People with Piping Details and Faces
- Gingerbread Cookie Hot Chocolate Mugs with Decor
With these ideas, you can decorate gingerbread cookies in countless ways, from simple to elaborate designs, creating festive treats that everyone will enjoy during the holiday season!
How to Decorate Gingerbread Cookie
Decorating gingerbread cookies can be a fun and creative activity, whether you’re making them for the holidays, a special event, or just for fun.

Step 1: Prepare the Cookies
- Bake the Gingerbread Cookies:
- Use your favorite gingerbread cookie recipe.
- Roll out the dough evenly and cut shapes using cookie cutters (gingerbread men, stars, trees, etc.).
- Bake and let them cool completely to prevent the icing from melting.
- Level the Surface:
- If the cookies are slightly uneven, lightly sand the edges with a fine grater once cooled.
Step 2: Gather Supplies
- Basic Supplies:
- Royal icing or buttercream frosting (in various colors).
- Piping bags with fine tips or zip-top bags with a corner cut.
- Toothpicks for fine details.
- Food coloring for custom icing colors.
- Decorative Elements:
- Sprinkles, edible glitter, or sanding sugar.
- Candy eyes, mini chocolate chips, or small candies.
- Shredded coconut, crushed peppermint, or edible pearls.
- Tools:
- Piping bags or bottles for precision.
- Offset spatula for spreading icing.
- A turntable (optional) for easier decorating.
Step 3: Outline the Cookies
- Prepare Royal Icing:
- Make icing thick enough to pipe outlines but not too stiff.
- Divide into bowls and color as desired using food coloring.
- Pipe the Outline:
- Fill a piping bag with icing.
- Pipe along the edges of the cookies to create a border.
- Let the outline dry for 5–10 minutes before moving to the next step.
Step 4: Flood the Cookies
- Thin the Icing:
- Add a small amount of water to the royal icing to create a thinner consistency for flooding.
- Test by dripping icing from a spoon; it should flatten within 10 seconds.
- Fill the Cookie:
- Pipe or spoon the thinned icing inside the outlined area.
- Use a toothpick or small spatula to spread it evenly and pop air bubbles.
- Let the cookies dry for at least 1–2 hours for a smooth finish.

Step 5: Add Decorative Details
- Create Patterns:
- Use contrasting icing colors to add stripes, swirls, or dots while the base is still wet.
- Use a toothpick to drag through patterns to create marbled or feathered designs.
- Add Dimensional Details:
- Once the base icing dries, pipe additional details like eyes, buttons, or snowflakes.
- Use stiffer icing for raised decorations.
- Attach Edible Decorations:
- Press sprinkles, candies, or glitter onto wet icing.
- Use a dab of icing as “glue” for heavier decorations like candy eyes or chocolate chips.

Step 6: Create Special Effects
- Glaze and Shine:
- Brush edible glitter or luster dust over dried icing for a sparkling effect.
- Use a clear edible glaze spray for a glossy finish.
- Textured Looks:
- Sprinkle shredded coconut for a snow effect.
- Use crushed peppermint for a festive touch.
- 3D Embellishments:
- Stack icing or use small fondant pieces for dimensional designs.
Step 7: Let Them Set
- Allow the cookies to dry completely, preferably overnight, if intricate designs are applied.
- Keep them on a flat surface away from humidity.
Step 8: Present or Store
- Packaging:
- Arrange cookies in gift boxes or bags with tissue paper or wax paper.
- Use clear cellophane bags tied with ribbon for gifting.
- Storage:
- Store decorated cookies in an airtight container to maintain freshness.
- Place parchment paper between layers to prevent smudging.
Tips for Success
- Practice designs on parchment paper before piping on the cookies.
- Keep icing covered to prevent it from drying out while working.
- Clean the tip of the piping bag regularly for crisp lines.

With patience and creativity, your gingerbread cookies will become edible works of art perfect for sharing or displaying. 🍪🎄